User Rating:  / 2
/ 2
- Details
-
Published on Sunday, 28 September 2014 16:37
-
Hits: 21884
|
 In the following step by step guide, I describe how to make a XP941 512G SSD Samsung bootable on a motherboard "Asrock Z97 Extreme6". In the following step by step guide, I describe how to make a XP941 512G SSD Samsung bootable on a motherboard "Asrock Z97 Extreme6".
This time it's not a software contribution. But elsewhere is still nowhere to find a suitable guide and so I published this step-by-step instruction in my own blog.
|
Specifically, I bought the new motherboard Asrock Z97 Extreme6 together with CPU and RAM. Feature was the use of SSD Samsung 512G XP941 with the manufacturer ID MZHPU512HCGL in the ultra-M2 slot on the motherboard. Especially is this because Asrock has lopped off here two PCIe lanes, which are actually determined for the graphics card to be used by the SSD so that it theoretically read with up to 1170 MB/s and write up to 930 MB/s.
The only drawback was the fact that Samsung has not offered the SSD for the consumer market and therefore no boot ROM has integrated. Ugly but, as I read before ordering, Asrock offers on this motherboard the ability to still be able to boot from this SSD. However, you have to know how to do it and also a few tips and tricks that currently are circulating on the internet must be ignored.
So here are the steps as I have got a bootable system:
Step 1 - Add a Windows Boot Manager to their bootable Windows image
You will find the matching boot manager only on Windows 8.x / Windows Server 2012 (R2) installation media from Microsoft in the following file:
\EFI\BOOT\BOOTX64.EFI
Who looks up on previous Windows installation medias, searches in vain! In this context it should be noted that legal licensing regulations must be observed, that the use of this file from Microsoft may be allowed only if a valid Windows 8.x license was acquired!
Step 2 - Preparing a new Windows installation image
Now a new Windows installation media must be created. In the root directory of this media the file BOOTX64.EFI should be inserted as follows:
- Copy the file to the root directory of the installation image
- Rename the file by shellx64.efi
The newly created image is then written to a bootable USB drive or burned to a bootable DVD.
Step 3 - Windows installation via EFI Shell
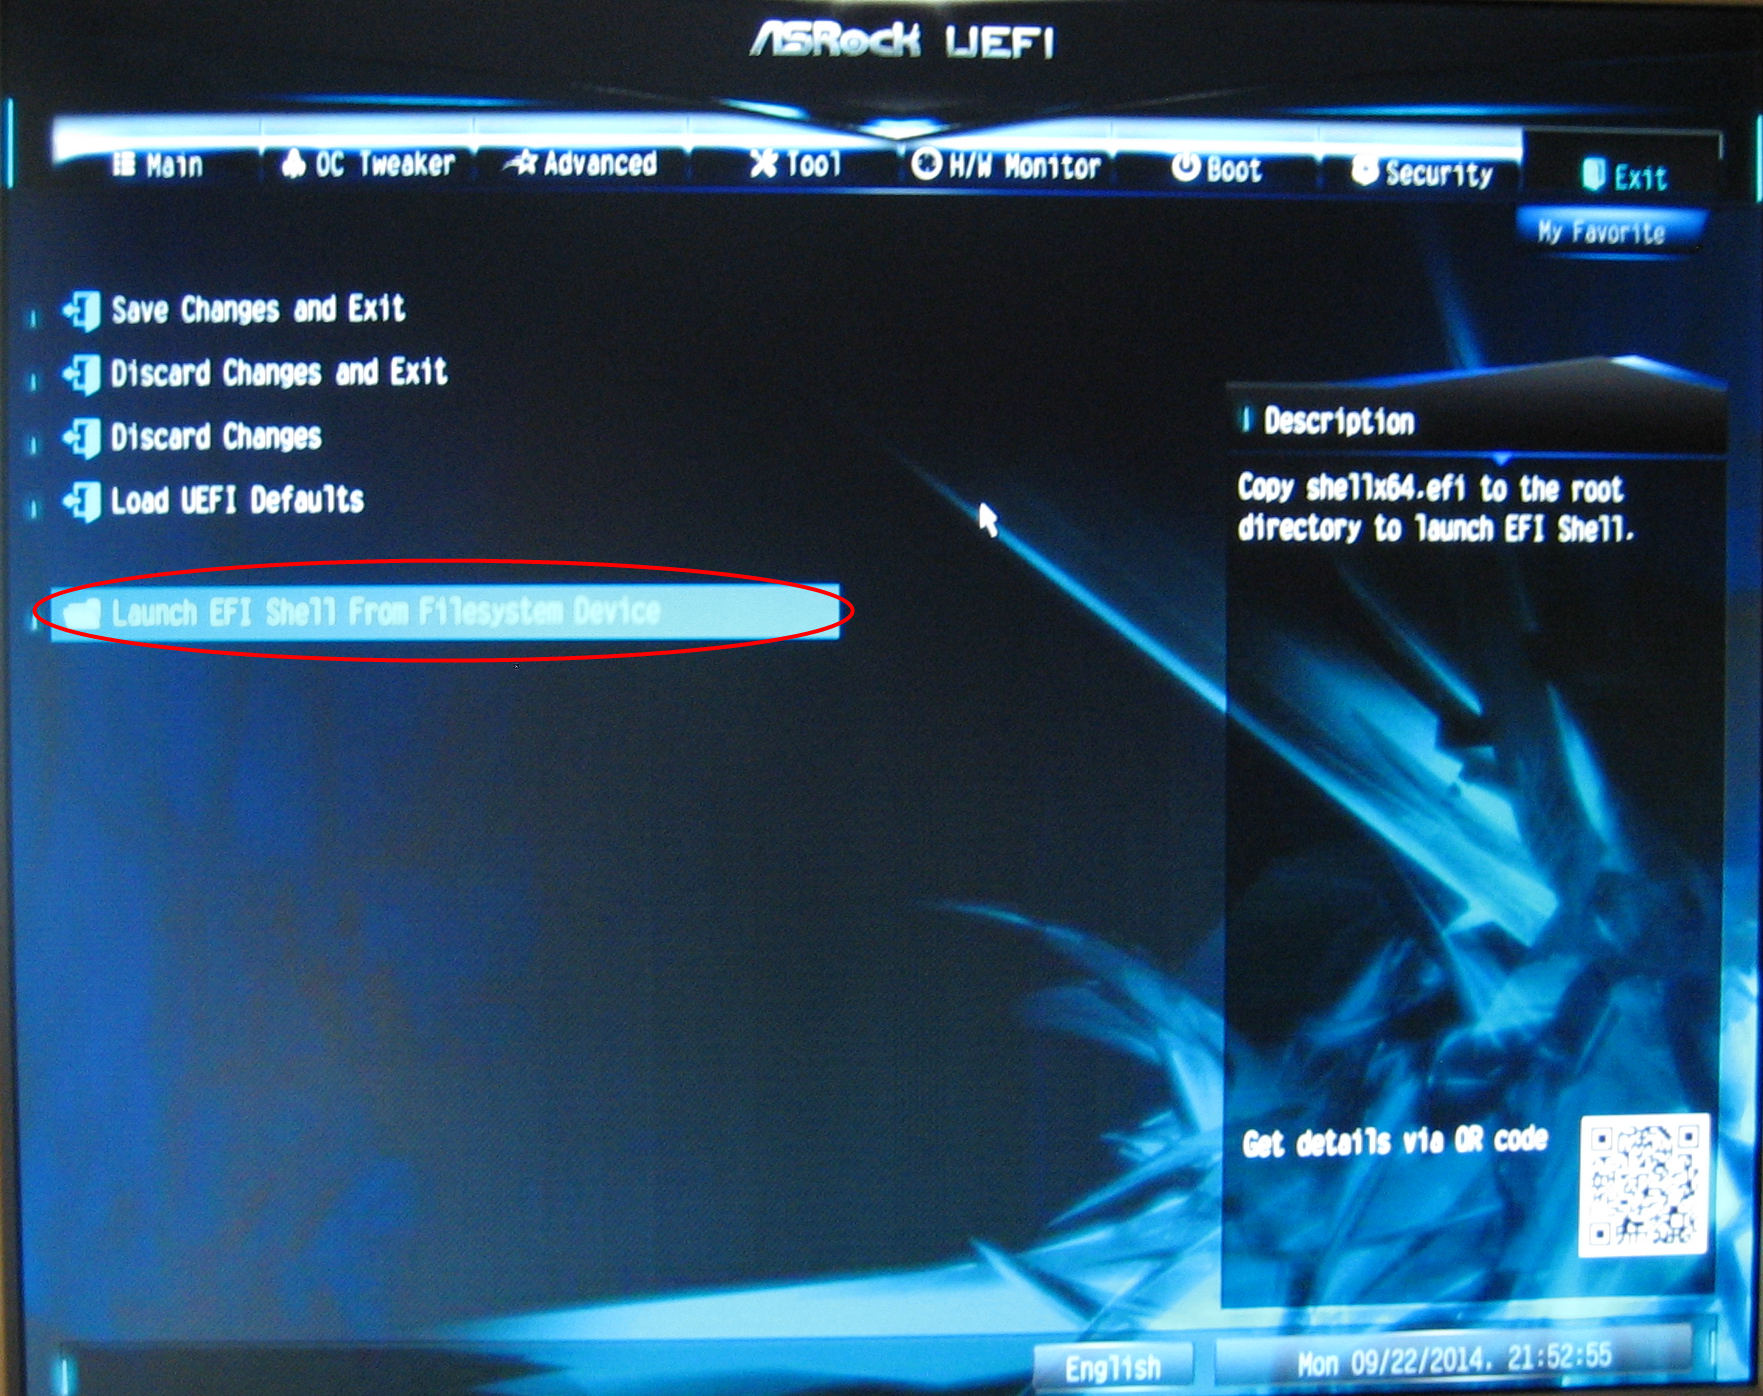
After plugging the USB stick or insert the Windows installation DVD into the DVD drive start up the computer. Then go directly into the BIOS and select the option "Launch EFI Shell From File System Device" in the Exit tab:
This will start the Windows Setup and the Samsung SSD should be displayed as an available hard disk drive where the installation may occur.
I had the problem that, in my case, the Windows Setup did not want to start without a connected DVD drive including a pickled Windows installation DVD even though I really wanted to perform the installation from a USB stick. Only when the drive was connected and the installation DVD (without the Boot Manager!) was inserted, the installation of Windows started.
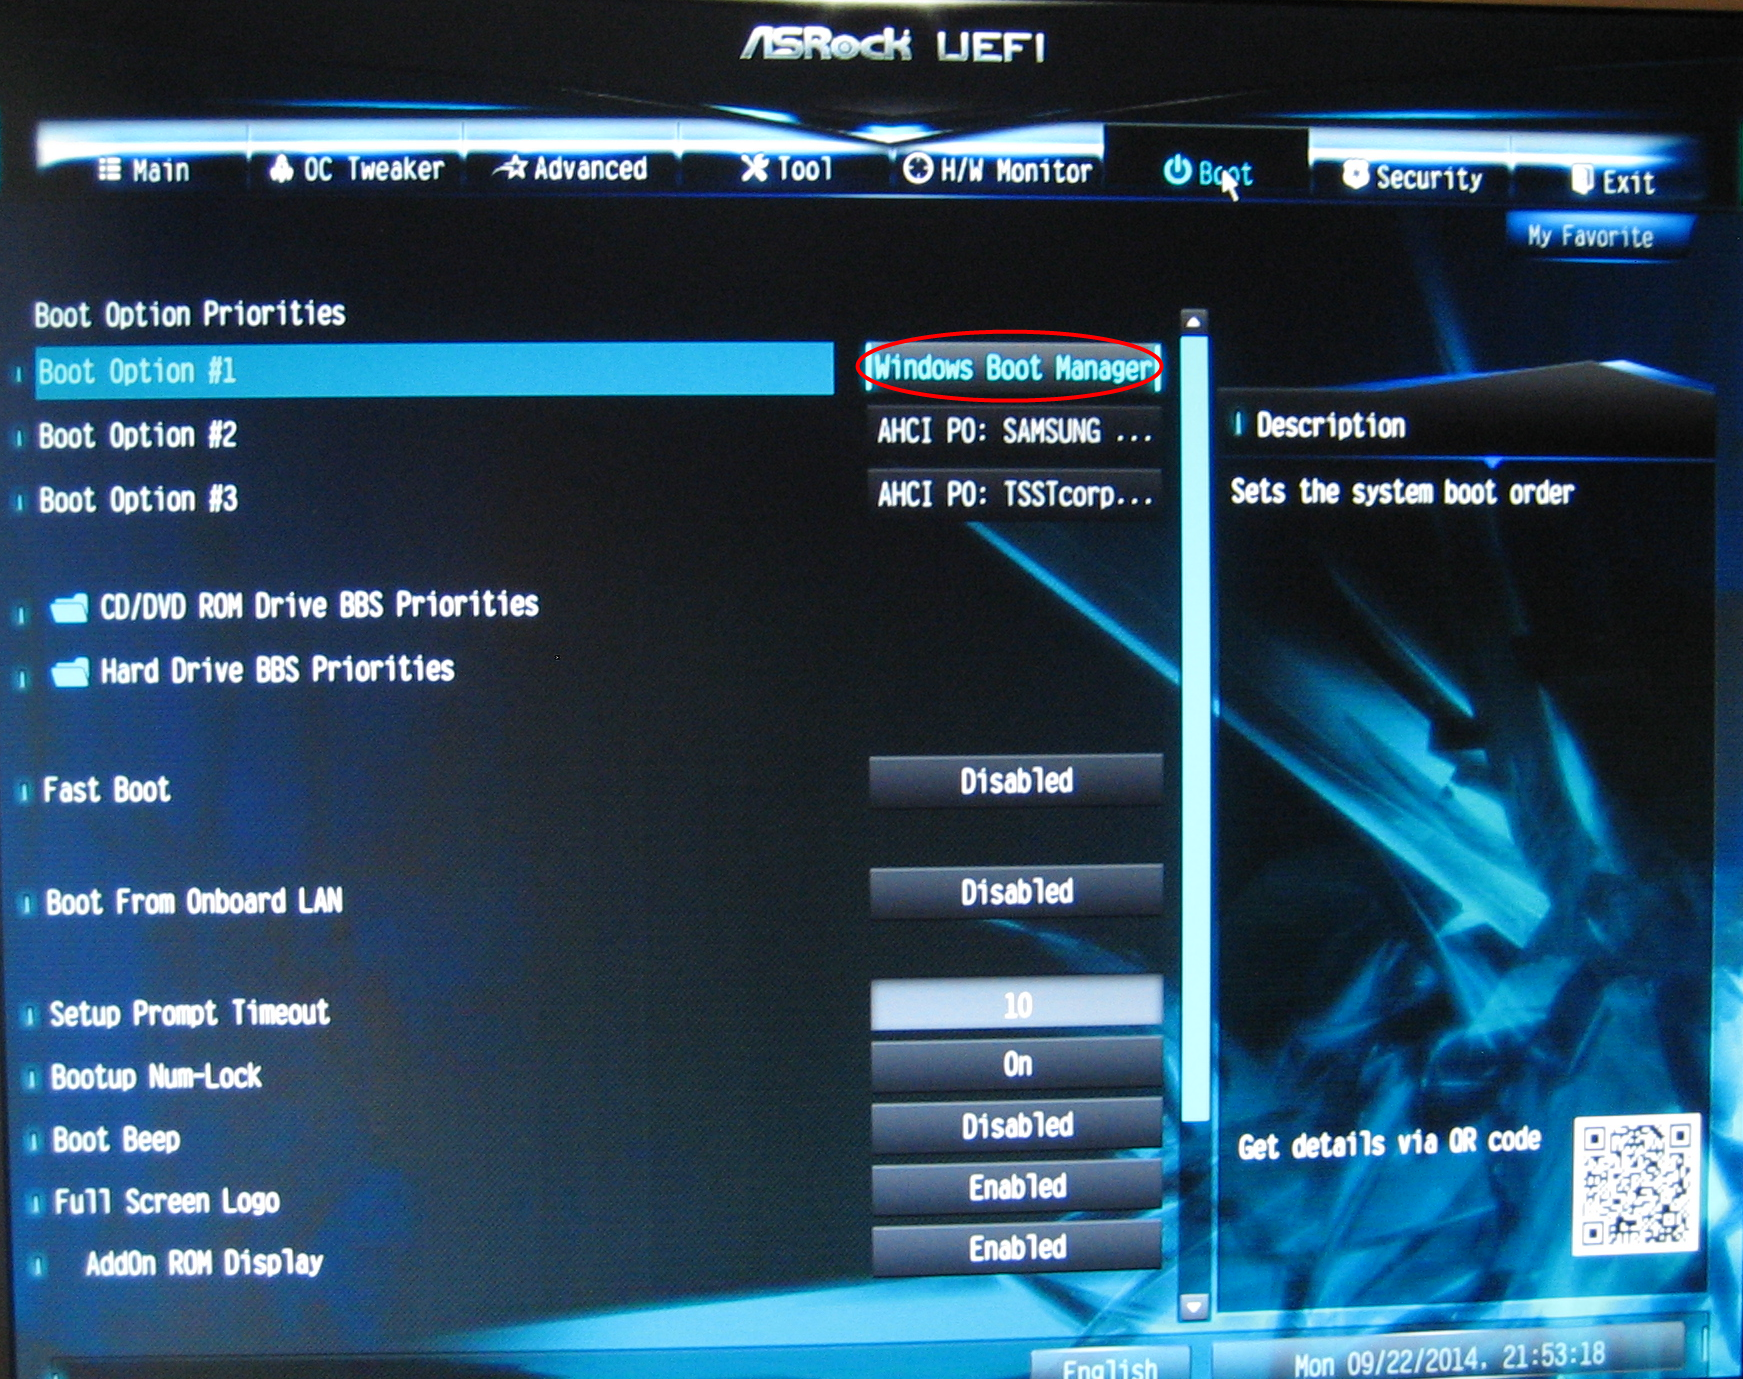
Step 4 - Select Windows Boot Manager as boot drive
If not already done in advance you should to ensure that the Windows Boot Manager is set as the first boot option in the BIOS:
That's it. Now, the OS should also easily boot from the SSD and goes out like Schmidts cat.
Anti-instructions
In the Internet there are also some instructions which you can safely "forget". Here you will find the list:
- Setting the Launch Storage Policy OpROM of the CSM option at the bottom of the boot Tab of the BIOS to the value "UEFI Only."
- Grab the BOOTX64.EFI file from a Linux distribution
(Is only interesting for connoisseurs of the Linux distribution, so who knows how the boot manager configured to use it.)
")